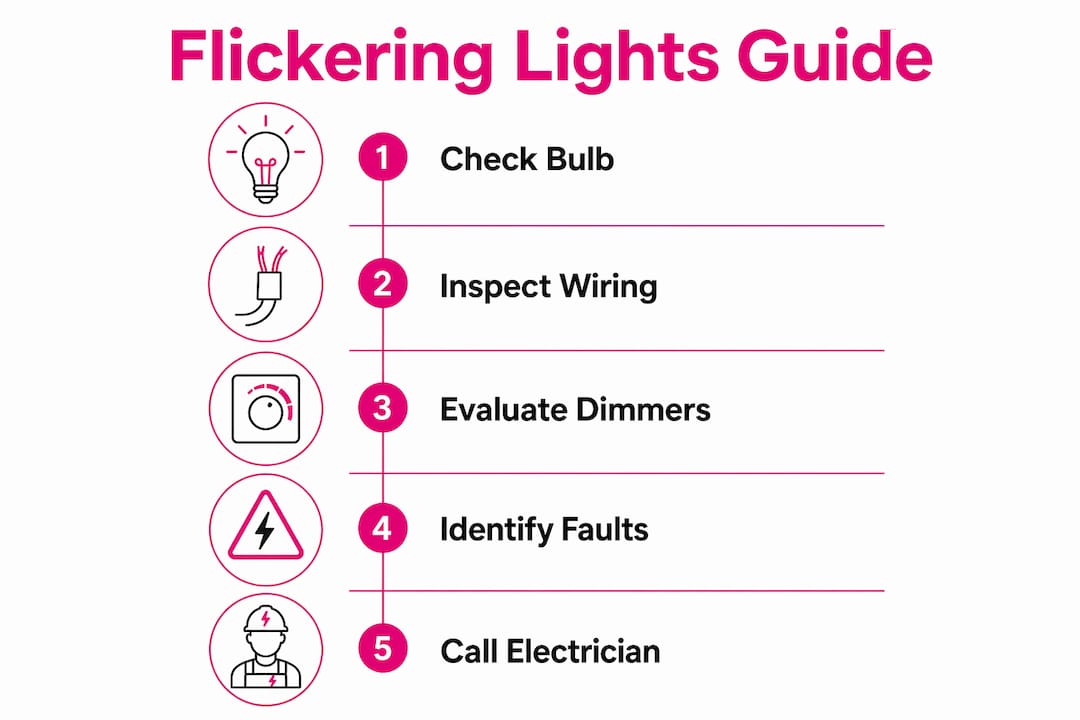
Flickering lights: what to check and when to call
Flickering lights usually point to one of three things: a simple bulb or fixture fault you can handle yourself, a wiring or driver compatibility issue, or a dangerous upstream connection problem that needs a licensed electrician. The pattern of the flicker tells you which scope you’re dealing with. Single-fixture flicker usually points to a loose bulb, dying LED driver, or socket fault, while multiple unrelated circuits flickering suggests an upstream problem such as a loose neutral at the switchboard or utility connection.
Start here — three safe steps right now:
- Power off first. Switch off the affected circuit at the switchboard before touching any fitting.
- Replace the bulb. Tighten or swap it with a known-good lamp. If the flicker stops, you’re done.
- Watch the pattern for 24 hours. Note when it happens: on appliance start-up, randomly, or across multiple rooms. That timing is the most useful information you can give an electrician.
Pro Tip: Photograph or video the flicker on your phone. Electricians can assess frequency and severity from footage, saving diagnostic time on-site.
Flickering that affects multiple circuits, comes with a burning smell, warm switch plates, or buzzing sounds is a potential fire risk under AS/NZS 3000 wiring standards. Turn off the main switch and call a licensed electrician immediately. For Sydney homeowners, Hdlevel2electriciansydney (High Demand Electrical) is available 24/7 for emergency callouts.
Table of Contents
- What do flickering lights actually tell you about the fault?
- Safe checks and simple fixes you can try first
- Why LEDs flicker more than older bulbs
- Do dimmers and smart switches cause LED flicker?
- Dangerous upstream faults you should not ignore
- Red flags that mean stop and call an electrician now
- What a licensed electrician will do on-site
- What does it cost to fix flickering lights in Sydney?
- How to prevent flicker from coming back
- Key takeaways
- Why the “just watch it for a while” approach costs more in the end
- High Demand Electrical: Sydney’s Level 2 flicker specialists
- Useful sources and distributor contacts
What do flickering lights actually tell you about the fault?
The location and timing of the flicker narrows the cause quickly. Think of it as a three-tier diagnostic map.
Single bulb or single fitting:
- Loose bulb or corroded socket contact
- Dying LED driver or failing ballast (in older fluorescent fittings)
- Incompatible dimmer for the bulb type installed
Single room or one circuit:
- Loose wiring at the switch, junction box, or fixture
- Faulty light switch with worn contacts
- Overloaded circuit drawing too much current
Multiple rooms or whole house:
- Loose neutral at the switchboard
- Failing main service connection or meter box fault
- Utility-side supply problem
Timing matters just as much as location. Lights that dim briefly when the air conditioner or a large appliance starts are usually experiencing normal voltage sag from a high-draw motor load. That brief dip is common. If the dimming is severe, lasts more than a second or two, or happens repeatedly, the circuit is likely undersized and needs a professional load assessment. Random flicker at night with no obvious trigger, or flicker that worsens over weeks, is a stronger warning sign of a loose connection or failing component.
A loose or corroded connection anywhere in the circuit creates resistance. That resistance generates heat, and sustained arcing heat is one of the leading causes of residential electrical fires. Never assume intermittent flicker is harmless if it keeps returning.
Safe checks and simple fixes you can try first
Before calling an electrician, work through this checklist in order. Stop at any step where you’re unsure or find a warning sign.
- Turn off the circuit. Go to your switchboard and switch off the breaker or RCD for the affected area. Never work on a live fitting.
- Tighten or replace the bulb. Wait for the globe to cool, then reseat it firmly. Try a different bulb from a known-good fitting to rule out a faulty lamp.
- Test the bulb in another fitting. Plug a lamp into a different circuit. If the flicker follows the bulb, the lamp or its driver is the problem.
- Reset the RCD or breaker. If a breaker has tripped, reset it once. If it trips again immediately, stop and call an electrician.
- Check for physical warning signs. Run your hand near (not on) switch plates and socket covers. Warmth, discolouration, or a faint burning smell means stop immediately.
- Inspect visible fittings for burn marks. Look at the base of the bulb and the inside of the shade or downlight trim for any scorching.
Pro Tip: Your phone camera can detect invisible flicker that your eyes miss. Record the lit globe in slow-motion mode (120fps or higher). Rapid dark bands scrolling through the footage confirm the lamp or driver is pulsing, even when it looks steady to the naked eye.
Most LED flicker cases fall into three groups: the lamp or driver, the control (dimmer or smart switch), or the supply and wiring. Isolating each layer in that order points you to the correct fix without unnecessary guesswork.
When a DIY fix is enough:
- Flicker stops after replacing the bulb
- Flicker stops after resetting the RCD and doesn’t return
- Only one fitting affected, no warmth or smell, new bulb resolves it
When you need a professional:
- Flicker returns after replacing the bulb
- Multiple fittings or circuits affected
- Any warmth, burning smell, buzzing, or visible discolouration
Why LEDs flicker more than older bulbs

LEDs are highly sensitive to power instability because they lack the thermal persistence of incandescent filaments. An incandescent globe glows from a hot wire that takes a moment to cool, smoothing out tiny voltage dips. An LED reacts almost instantly to any change in current, making it a reliable indicator of supply quality that older bulbs simply masked.

The driver is the component that converts mains AC power into the stable DC current an LED need. When a driver fails, the most common culprit is the electrolytic capacitor inside it. These capacitors degrade under heat, losing their ability to filter out ripple current. The result is pulsing or flicker, often most visible at low dim levels where the driver is working hardest.
Common driver failure symptoms:
- Flicker that worsens as the room warms up
- Pulsing or strobing at low dim settings
- Invisible flicker causing eye strain or headaches (confirmed by slow-motion camera test)
- Lamp that flashes briefly when first switched on, then settles
Pro Tip: To isolate a driver fault from a supply fault, move the suspect lamp to a circuit on the other side of your switchboard. If the flicker follows the lamp, replace the driver or the whole fitting. If the flicker stays on the original circuit, the wiring or supply is the issue.
Because LEDs react instantly to small voltage changes, they act like canaries for upstream instability that older incandescent bulbs masked. Sudden LED flicker in a home that previously had no issues can reveal long-standing wiring or supply faults that were always there but never visible.
Do dimmers and smart switches cause LED flicker?
Yes, and it’s one of the most common causes of LED flicker in Australian homes. The problem comes down to compatibility. Most older dimmers were designed for incandescent loads, which draw significantly more wattage than LEDs. Legacy TRIAC dimmers often require a minimum load to operate correctly, and a low-wattage LED fitting falls well below that threshold, causing the dimmer to misfire and the light to flicker.
| Bulb/driver type | Compatible dimmer type | Common issue if mismatched |
|---|---|---|
| Standard LED (non-dimmable) | No dimmer — switch only | Flicker, reduced lamp life |
| Dimmable LED | Trailing-edge (electronic) | Flicker at low levels if leading-edge dimmer used |
| Dimmable LED | Leading-edge (TRIAC) | Flicker, buzzing, narrow dim range |
| LED driver | Low-voltage control only | No dimming or full flicker if wrong type used |
| Smart bulb | Smart switch or app only | Flicker or dropout if paired with a standard dimmer |
Troubleshooting dimmer and smart switch flicker:
- Check the dimmer’s compatibility list. Most reputable dimmer manufacturers publish tested LED models on their website.
- Replace a leading-edge dimmer with a trailing-edge (electronic) model rated for LED loads.
- For smart switches without a neutral wire, leakage current through the load can cause flicker. Fit a snubber module across the load terminals, or replace the switch with a neutral-type smart switch.
- If using smart bulbs, remove any dimmer from the circuit entirely. Smart bulbs manage their own dimming internally and conflict with external dimmers.
- Check the lighting installation is wired correctly for the control type fitted.
Dangerous upstream faults you should not ignore
Some flicker patterns point to faults that go well beyond a bulb or dimmer. These require immediate action.

A high-resistance or failing neutral at the service entrance is one of the most dangerous scenarios. When the neutral connection degrades, voltage on one phase can rise above safe levels while the other sags. You may notice lights on one side of the house brightening while lights elsewhere dim, electronics failing in clusters, or rapid bulb burnout. This is a distributor-level urgency.
Loose connections anywhere in the circuit produce arcing. Arcing generates intense localised heat and is a leading cause of residential fires. Backstabbed wiring (push-in spring terminals common in older Australian homes) loosens over time from thermal cycling, and re-terminating those connections under screw clamps commonly cures intermittent flicker while removing an arc-fault risk.
If lights on one side of your home are brightening while others dim, or if multiple appliances fail at the same time, turn off your main switch immediately. Call an emergency electrician and contact your electricity distributor to report a suspected neutral or supply fault. Do not wait.
Upstream fault warning signs:
- Whole-house random flicker with no single trigger
- Lights brightening and dimming simultaneously on different circuits
- Multiple appliances or electronics failing at the same time
- Buzzing from the meter box or switchboard
- Visible sparking at any outlet, switch, or the meter box
Red flags that mean stop and call an electrician now
Some symptoms mean you should stop troubleshooting and pick up the phone.
- Burning smell from any fitting, switch plate, or the switchboard
- Warm or hot switch plates or socket covers to the touch
- Visible sparking at any point in the system
- Frequent breaker trips on the same circuit
- Buzzing or crackling sounds from switches, fittings, or the panel
- Flickering that has worsened progressively over days or weeks
- Electronics failing in multiple rooms at the same time
For any of these, isolate the affected circuit at the switchboard. If the symptom involves the main panel or affects the whole house, turn off the main switch. Call an emergency electrician for same-day or after-hours attendance. Contact your electricity distributor if you suspect a neutral or supply fault on the network side.
Pro Tip: Note the exact time, which circuits were affected, and whether any appliances were running when the event occurred. This brief log gives an electrician a precise starting point and can halve diagnostic time on-site.
Same-day callout is appropriate whenever you have a burning smell, sparking, warm plates, or flicker that cannot be isolated to a single fitting. These are not situations to monitor overnight.
What a licensed electrician will do on-site
A professional diagnostic visit for persistent or serious flicker typically follows a structured sequence. Understanding the process helps you give a better brief and know what to expect.
- Voltage measurements at the consumer mains. The electrician checks leg-to-neutral voltage under load to identify supply instability or a failing neutral.
- Visual inspection of the switchboard and meter box. They look for signs of overheating, corrosion, loose terminations, and outdated components.
- Load testing. Circuits are tested under normal operating load to replicate the flicker condition and measure voltage drop.
- Receptacle and fixture testing. Individual outlets and fittings are checked for loose connections, back-stabbed wiring, and correct termination.
- IR thermography. A diagnostic thermal scan identifies hot spots at connections, breakers, and termination points that are invisible to the eye.
- Driver and dimmer testing. The electrician tests the lamp, driver, and control in isolation to confirm compatibility and component condition.
Common repairs after diagnosis:
- Tighten or re-terminate loose connections (screw clamp replacement of back-stabbed wiring)
- Replace a faulty LED driver or ballast
- Swap an incompatible dimmer for a trailing-edge LED-rated model
- Rewire a junction box or fixture with damaged insulation
- Switchboard repairs: replace a failing breaker, tighten neutral bar connections
- Level 2 work: service connection repairs, meter box upgrades, or network-side neutral faults
In Australia, a licensed electrician holds a state electrical licence and can work on all internal wiring. A Level 2 Authorised Service Provider (ASP) holds an additional accreditation to work on the network connection between the street and your meter, including service fuses, metering, and private power poles. Hdlevel2electriciansydney holds Level 2 ASP accreditation, meaning the team can handle both internal faults and supply-side issues without needing to hand off to a second contractor. For fault finding and diagnosis, that single-contractor capability saves time and cost.
What does it cost to fix flickering lights in Sydney?
Costs vary by fault type and urgency. These are ballpark figures for the Sydney market and will differ based on access, fault complexity, and whether after-hours attendance is required.
| Fix type | Typical time | Ballpark cost (AUD) |
|---|---|---|
| Replace bulb or driver (homeowner) | 5 mins | $5–$20 (parts only) |
| Electrician diagnostic visit | 30 mins | — |
| Replace dimmer or switch | 30 mins | — |
| Re-terminate loose fixture wiring | 1–2 hours | — |
| Switchboard neutral or breaker repair | 1–3 hours | — |
| Level 2 service connection repair | Half to full day | — |
| Full switchboard upgrade | Half to full day | — |
- After-hours and emergency callouts carry a premium, typically an additional call-out fee on top of the hourly rate.
- Urgent panel or neutral issues are same-day work by necessity. Delaying a loose neutral fault risks appliance damage and fire.
- Level 2 work requires a licensed ASP and may involve coordination with your electricity distributor, which can extend the timeline by one to two business days for network-side repairs.
How to prevent flicker from coming back
Fixing the immediate fault is only half the job. A few straightforward habits keep lights steady long-term.
- Buy quality LED lamps and drivers. Look for a flicker index below 0.10 and percent flicker under 5% on the product specification. Cheap drivers with low-grade capacitors are the most common repeat failure point.
- Match dimmers to the load. Always check the dimmer’s compatibility list before installing. Replace any legacy TRIAC dimmer controlling LED loads with a trailing-edge model.
- Secure all fittings. Check that downlight trims, batten holders, and pendant fittings are firmly seated. Vibration from foot traffic above can loosen connections over time.
- Install surge protection. A whole-house surge protector at the switchboard protects LED drivers and sensitive electronics from voltage spikes that accelerate component failure.
- Schedule a periodic electrical safety inspection. Australian homes older than 25 years often have back-stabbed wiring, ageing switchboards, and connections that have never been checked. A professional inspection catches these before they cause flicker or worse.
- Book a proactive Level 2 check for older switchboards. If your switchboard has not been inspected in the last decade, a Level 2 assessment confirms the service connection and metering are sound.
Pro Tip: When replacing downlights, choose fittings with a published flicker specification and a driver rated for the full input voltage range (typically 200–240V). A driver with a narrow input tolerance will flicker more readily during normal supply fluctuations.
Key takeaways
Flickering lights in an Australian home almost always trace to one of three scopes: a faulty bulb or driver, a wiring or dimmer compatibility fault, or a dangerous upstream connection issue that needs a licensed electrician immediately.
| Point | Details |
|---|---|
| Match flicker scope to cause | Single fitting suggests bulb or driver; multiple circuits suggest a loose neutral or supply fault. |
| Safe DIY first steps | Power off, replace the bulb, test in another fitting, reset the RCD, check for warmth or burning smell. |
| Red flags need immediate action | Burning smell, warm plates, sparking, or whole-house flicker means isolate and call an emergency electrician now. |
| LED sensitivity reveals hidden faults | LEDs react instantly to voltage changes, exposing wiring or supply faults that incandescent bulbs masked. |
| Hdlevel2electriciansydney for Sydney | High Demand Electrical is a certified Level 2 ASP available 24/7 for emergency callouts, switchboard diagnostics, and supply-side repairs across Sydney. |
Why the “just watch it for a while” approach costs more in the end
Most homeowners who call us have been watching the flicker for weeks. By the time they book, a loose connection that would have been a simple re-termination has sometimes progressed to a scorched junction box or a damaged circuit. The diagnostic logic in this article is sound: start with the bulb, work outward, and stop the moment you find a warning sign. What I’d add from experience is that the pattern matters more than the frequency. A light that flickers once a week but always does it when the air conditioner starts is a very different fault from one that flickers randomly at 2 AM with no load change. The first is usually a circuit capacity issue. The second is almost always a connection problem, and connection problems don’t get better on their own.
Sydney homes built before the mid-1990s are particularly prone to back-stabbed wiring in switches and outlets. Those push-in terminals were fast to install but they loosen over decades of thermal cycling. We find them regularly during fault-finding visits, and re-terminating them under proper screw clamps is one of the most cost-effective repairs we do. It cures the flicker and removes an arc-fault risk in one step. If your home is older and you’ve had intermittent flicker for more than a few weeks, that’s the most likely culprit.
High Demand Electrical: Sydney’s Level 2 flicker specialists
When a bulb swap doesn’t fix it, you need a team that can follow the fault all the way back to the street if necessary. High Demand Electrical is a certified Level 2 electrician and Authorised Service Provider, which means the same crew that diagnoses your internal wiring can also repair the service connection, meter box, or private power pole without handing off to a second contractor. That saves time and avoids the coordination delays that come with multi-contractor jobs.

The team is available 24/7 for emergency callouts across Sydney, rain, hail, or shine. A typical visit covers a full diagnostic sequence: voltage measurements, switchboard inspection, thermal scan, and a written quote before any repair work begins. Free site inspections apply to Level 2 work, so you know exactly what you’re up for before committing. Over 300 five-star reviews reflect a consistent track record of same-day fault resolution and transparent pricing. For urgent faults, book an emergency make-safe online or call the team directly for immediate attendance.
Useful sources and distributor contacts
- Energy Safe Victoria — electrical licensing and safety information: energysafe.vic.gov.au
- AS/NZS 3000:2018 (Wiring Rules) — the Australian and New Zealand standard governing electrical installations; available through Standards Australia
- Your electricity distributor — for suspected neutral or supply faults, contact your network distributor directly (Ausgrid, Endeavour Energy, or Essential Energy in NSW; Energex or Ergon in Queensland; AusNet, CitiPower, Powercor, United Energy, or Jemena in Victoria). Distributor emergency numbers are listed on your electricity bill and on each distributor’s website.
- Flicker basics (US Department of Energy): energy.gov — technical background on LED flicker metrics including flicker index and percent flicker
- JD Lighting AU — dimmer compatibility guide: jdlighting.com.au — practical advice on matching dimmers to LED loads in Australian installations
This article is general information only and does not constitute electrical or safety advice for your specific situation. Confirm current standards and requirements with a licensed electrician or the relevant state electrical safety regulator.
Recommended
Powering Your Needs with Expertise
If you’re looking for a reliable, experienced, and prompt electrician, look no further than High Demand Electrical. We cater to all your electrical needs, from routine maintenance to emergency repairs and complete system installations. Our skilled team is committed to providing professional service that ensures your electrical systems run smoothly. Whether it's a small task or a large project, give us a call today. Let us meet all your electrical demands with the quality and reliability you deserve.