LED downlight upgrade: costs, compatibility and install steps
Yes, upgrading to LED is usually worth it. Whether you can do it yourself depends on two things: your existing lamp base (GU10 or MR16 with a transformer) and whether the circuit is dimmed. Check both before you buy a single globe.
Start with this quick assessment:
- Look at the lamp base: GU10 has a twist-lock fitting and runs on 240V; MR16 has two small pins and runs on 12V through a transformer.
- Check if the circuit is on a dimmer switch, and if so, note the brand and model.
- Look above the ceiling (or ask an electrician to) for a hardwired connection versus a plug-in transformer.
Halogen downlights typically draw around 50W each, while an equivalent LED draws just 7 to 12W. The main catch: older transformers and dimmers built for halogen often don’t play nicely with LED loads, and that mismatch is where most botched upgrades happen.
Key Takeaways
Upgrading halogen downlights to LED cuts running power per fitting from roughly 50W to 7 to 12W, and the main barrier to a smooth swap is transformer or dimmer incompatibility, not the LED itself.
| Point | Details |
|---|---|
| Identify your fitting first | Check for GU10 (240V twist-lock) or MR16 (12V, transformer-fed) before buying any globes. |
| Flicker means a fix is needed | Trailing-edge dimmers or LED-compatible transformers resolve most flicker and buzz issues. |
| Budget realistically | Single-room jobs run $250 to $600; whole-house upgrades often land between $800 and $2,500. |
| Match ratings to the room | IC-4 for insulated ceilings, IP44+ for bathrooms, CRI 90+ for kitchens and living areas. |
| Call a licensed contractor for wiring work | Hdlevel2electriciansydney offers free site inspections for transformer, dimmer and rewiring jobs. |
Table of Contents
- What does a led downlight upgrade cost, and does it pay for itself?
- GU10 swap, MR16 retrofit, or full rewire: which upgrade route fits?
- Why do new LEDs flicker or buzz, and how do you fix it?
- What lumens, colour temperature and IP rating should you look for?
- What actually happens on installation day?
- Can you swap the bulbs yourself, or do you need an electrician?
- How High Demand Electrical handles LED downlight upgrades
- Where to check the technical detail yourself
- What most guides get wrong about this upgrade
- Ready to fix flicker and cut your lighting bill for good?
- Sources
What does a led downlight upgrade cost, and does it pay for itself?
Budget-wise, this project scales from “weekend job” to “call an electrician” pretty fast, depending on what’s already in your ceiling.
- GU10 LED bulbs: roughly $8 to $25 each at retail, depending on brand, lumen output and dimmable rating.
- Integrated LED downlight kits (fitting and driver combined): approximately $20 to $50 per unit supply-only.
- Supply and install, single room (say 6 to 8 downlights, no rewiring needed): commonly $250 to $600.
- Whole-house upgrade (15 to 30 fittings, straightforward swap): often $800 to $2,500.
- Transformer replacement or dimmer swap per circuit: typically $150 to $250, on top of fitting costs if your existing system needs it.
A rough payback example: swap ten 50W halogens for 10W LEDs running four hours a night. That’s a drop from 500W to 100W, saving 400W over four hours, or 1.6kWh a day. At around $0.30 per kWh, that’s roughly $175 a year in electricity alone, before you even count halogen globes burning out every 12 to 18 months. On a whole-house job costing $1,500, that’s a payback window of well under ten years, often much sooner once you factor in reduced maintenance.
GU10 swap, MR16 retrofit, or full rewire: which upgrade route fits?
Most Australian homes fall into one of two camps, and the camp you’re in decides how easy this job is.
GU10 systems run on standard 240V mains power with a twist-lock base. These are the easy win: in most cases, you can swap the halogen globe for an LED GU10 equivalent directly, no rewiring required.
MR16 systems run on 12V through a transformer, usually hidden in the ceiling space or roof void. These are trickier, because the transformer was built for halogen’s higher load, and an LED draws too little current to register properly on many older magnetic transformers.
Here’s how to match the fix to your setup:
- Straight bulb swap — works when you’ve already got GU10 (240V) fittings and no dimmer, or a dimmer confirmed LED-compatible. Cheapest and fastest option.
- MR16 retrofit module — a self-contained LED unit with its own driver, designed to bypass the old transformer. Works in some MR16 housings but not all; check the housing depth and driver compatibility first.
- Full fitting replacement or rewire to 240V — removes the transformer entirely and installs new GU10 or integrated LED downlights. Higher upfront cost, but the most reliable long-term outcome when a transformer feeds multiple fittings.
Pro Tip: Take a photo of your existing downlight from below and another looking up into the ceiling cavity if you can safely access it. A sparky can often tell you which upgrade route applies before they even arrive on site.
Why do new LEDs flicker or buzz, and how do you fix it?
Flicker and buzz almost always come down to one of two culprits: a transformer that can’t handle the lower LED load, or a dimmer built for halogen’s electrical characteristics instead of LED’s.
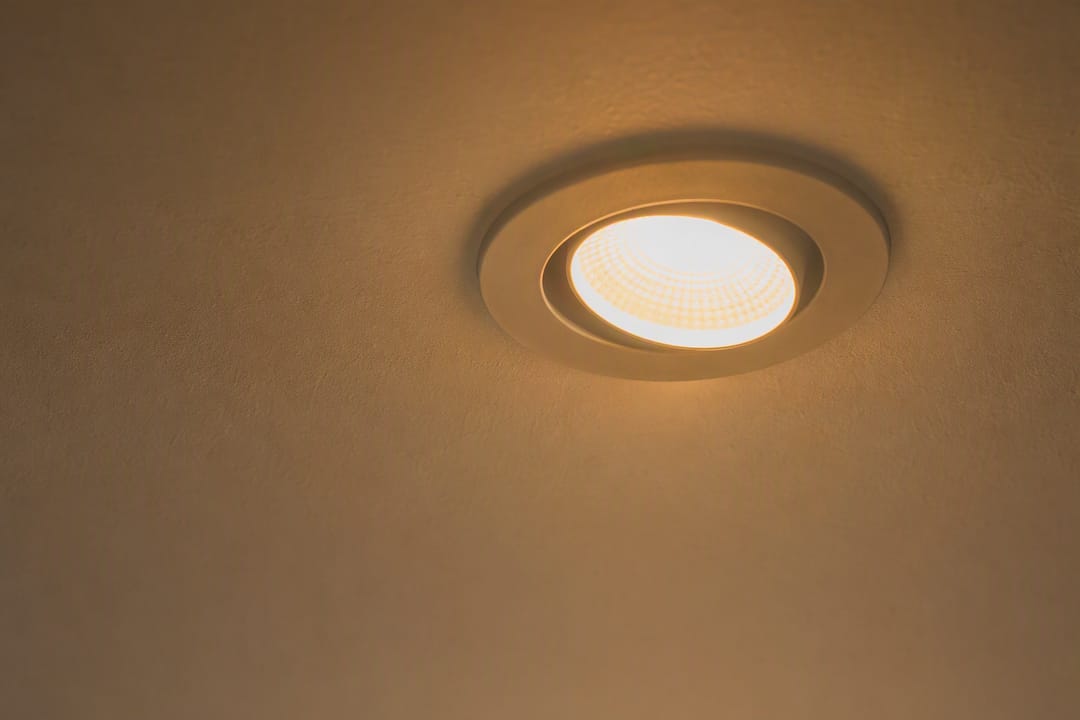
Older magnetic transformers have a minimum load requirement, often designed around several 50W halogens. Drop in low-wattage LEDs and the total load falls below that threshold, so the transformer misbehaves, causing flicker, buzzing or fittings that won’t turn off fully. Dimmers cause a similar issue: most pre-LED dimmers use “leading-edge” technology, which cuts the power waveform in a way that suits halogen but confuses LED drivers.
Three practical fixes, roughly in order of cost:
- Replace the dimmer with a trailing-edge, LED-compatible model — this alone resolves flicker on many GU10 setups.
- Install a purpose-built LED-compatible electronic transformer if you’re keeping an MR16 system.
- Rewire to 240V and switch to GU10 or integrated fittings, removing the transformer from the equation entirely.
Pro Tip: Before booking a tradesperson, photograph the dimmer switch’s model number, the transformer if visible, and the downlight itself. It saves a return visit and gets you a more accurate quote over the phone.
What lumens, colour temperature and IP rating should you look for?
Halogen wattage doesn’t translate directly to LED wattage, so shop by lumens instead. A 50W halogen puts out roughly 400 to 500 lumens, so look for an LED downlight rated in that range for equivalent brightness, even though it’ll only draw 7 to 10W to get there.
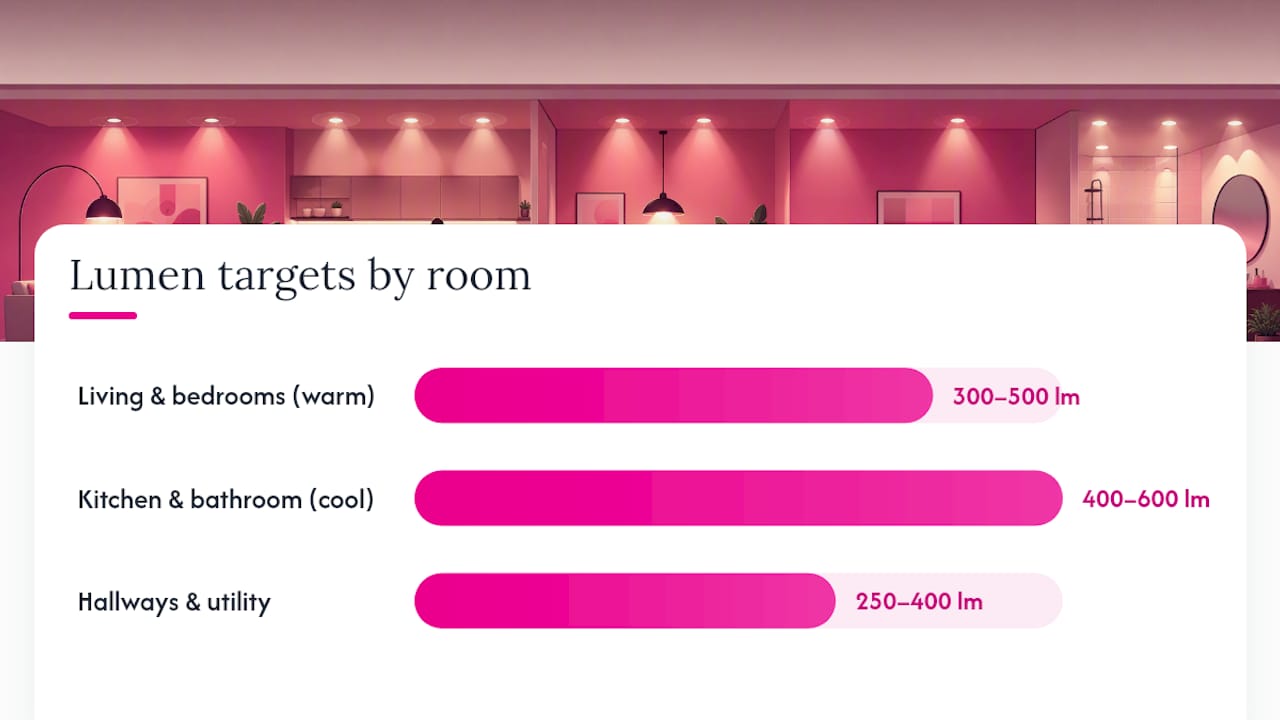
Rough lumen targets by room:
- Living areas and bedrooms: 300 to 500 lumens per fitting, warm white (2700K to 3000K).
- Kitchens and bathrooms: 400 to 600 lumens, cool white (4000K), for task visibility.
- Hallways and utility spaces: 250 to 400 lumens is usually plenty.
Colour rendering matters more than most homeowners realise. A CRI (Colour Rendering Index) of 90 or above is worth paying for in kitchens and living rooms, where accurate colour matters for cooking and everyday tasks.
Two safety ratings to check on the box before you buy:
- IC or IC-4 rating: required if ceiling insulation covers or contacts the fitting, which is common in most Australian homes.
- IP44 or higher: required for bathrooms and any downlight near moisture or steam.
Skipping these ratings isn’t just a compliance issue. It’s a fire risk if insulation sits against a non-IC-rated fitting.
What actually happens on installation day?
A competent electrician starts with a look, not a drill. They’ll check your ceiling space, confirm whether there’s a shared transformer, inspect switchboard capacity, and check for insulation contact around existing fittings.
- Site inspection — confirms fitting type, dimmer compatibility, insulation status and switchboard access. Often free for straightforward jobs.
- Isolate power and remove old fittings — halogen housings and any old transformers come out first.
- Install new LED fittings — typically 15 to 30 minutes per downlight for a straightforward swap, longer if cutting new holes or running new cable.
- Test dimming and function — every circuit gets checked for flicker, buzz and correct dimming curve before the job’s called done.
- Compliance check and paperwork — IC/IP compliance confirmed, site cleaned, and an electrical safety certificate issued where required.
A single-room job (six to eight downlights, no rewiring) usually wraps in half a day. A whole-house job with transformer removal can run one to two days.
Can you swap the bulbs yourself, or do you need an electrician?
Some of this job is genuinely DIY-friendly. Some of it will land you in legal and safety trouble if you attempt it yourself.
Safe for a competent DIYer:
- Swapping a GU10 LED bulb into an existing 240V fitting on a non-dimmed circuit.
- Replacing like-for-like MR16 retrofit modules where the manufacturer confirms plug-and-play compatibility.
Requires a licensed electrician:
- Any work involving hardwired 240V terminals or switchboard connections.
- Transformer replacement or removal, and any rewiring from 12V to 240V.
- Fittings near insulation where IC compliance is in question.
Hiring a licensed electrician isn’t just about following the rules, it’s about getting a certificate of compliance that protects you if there’s ever an insurance claim or a resale inspection. Before requesting a quote, send photos of the lamp base, dimmer model, fitting count, and whether insulation is visible near the ceiling.
How High Demand Electrical handles LED downlight upgrades
Hdlevel2electriciansydney is a certified Level 2 electrical contractor with over 300 five-star reviews and 24/7 availability for urgent work.
- Free site inspections for Level 2 work, so you get an accurate quote before committing to transformer or rewiring jobs.
- Diagnosis-first approach: checking transformer load, dimmer type and insulation contact before recommending a fix.
- IC/IP compliance built into every quote, with certificates issued on completion.
- Experience across residential, commercial and strata properties, from single-room swaps to full power supply upgrades.
Where to check the technical detail yourself
- Sustainability Victoria’s halogen replacement guidance covers energy savings and payback basics.
- Victorian Energy Upgrades registry lists accredited installers and rebate eligibility.
- Bunnings’ LED versus halogen downlight advice explains retrofit product options like MR16 modules.
- Homeowners dealing with ceiling insulation near non-IC fittings can also review insulation repair and upgrade services.
What most guides get wrong about this upgrade
Most advice on this topic treats the bulb swap as the whole story, when the transformer and dimmer are usually where the job succeeds or fails. I’d argue the conventional “just buy LED globes and screw them in” framing does homeowners a disservice, because it sets up the MR16 crowd for flicker, buzzing fittings, and a second call to a tradesperson they didn’t budget for.
The research here points to a clearer priority order: diagnose before you buy. Knowing whether you’ve got GU10 or MR16, and whether your dimmer is leading-edge or trailing-edge, tells you almost everything about cost and complexity before a single globe changes hands. Homeowners who skip that step end up buying the wrong product twice.
Where I’d push back hardest on typical advice is the assumption that DIY savings are worth the risk on anything touching a transformer or hardwired terminals. The certificate of compliance you get from a licensed job matters more than the money saved doing it yourself, particularly if you ever sell the property or make an insurance claim. Get the diagnosis right first. Everything else, cost, timeframe, product choice, follows from that.
— Christopher
Ready to fix flicker and cut your lighting bill for good?
If your downlights buzz on the dimmer or you’re not sure whether you’re dealing with GU10 or MR16, guesswork is how homeowners end up paying twice for the same job. Hdlevel2electriciansydney offers free site inspections for Level 2 electrical work, so you get a straight answer on transformer condition, dimmer compatibility and IC/IP compliance before any money changes hands. As a certified Level 2 contractor with 24/7 availability and over 300 five-star reviews, the team handles everything from a simple GU10 swap to a full rewire and switchboard check on the same visit. Book a Level 2 electrician to get your downlights diagnosed and quoted properly the first time.
Sources
Recommended
Powering Your Needs with Expertise
If you’re looking for a reliable, experienced, and prompt electrician, look no further than High Demand Electrical. We cater to all your electrical needs, from routine maintenance to emergency repairs and complete system installations. Our skilled team is committed to providing professional service that ensures your electrical systems run smoothly. Whether it's a small task or a large project, give us a call today. Let us meet all your electrical demands with the quality and reliability you deserve.